Retro Aesthetics. Online Manual
Retro Aesthetics asset provides all resources to turn a game of any genre into a stylish 80’s movies inspired title. It covers object materials, a full-screen camera effect, textures and UI, sound effects and music, as well as color presets and demos of the asset in action. We made it easily extensible to give you a possibility to tune to the unique needs of your game. In this document we describe each component of the asset and explain how it can be tuned to your needs.
Demos
We believe that the best way to learn the asset is by playing with the provided demos. The included demos are completely optional, but if you’d like to check them out, extract the RetroAestheticsDemos.unitypackage in the RetroAesthetics/Demos folder.
To view the demos you need to import the Post Processing Stack asset as well. Go to Window ▶︎ Package Manager, switch the view from In Project to Unity Registry and select Post Processing in the list. In the right panel you’ll find information about the package and a button to download and import or update to the latest available version for the currently running version of Unity.
Our Demos package includes two sets of scenes: a generic menu (Demos/Menu) and an example game, which we chose to be an arcade racing (Demos/Racing). Each of those demos includes some specific resources, which are located in the same folder as the scenes. If you do not need the demos in your project, feel free not to import the root Demos folder, so that only core asset resources are added to your game.
Note: Make sure to bake lighting before using the demos (Window – Lighting – Bake).
Menu scenes
Demos/Menu folder includes the following scenes:
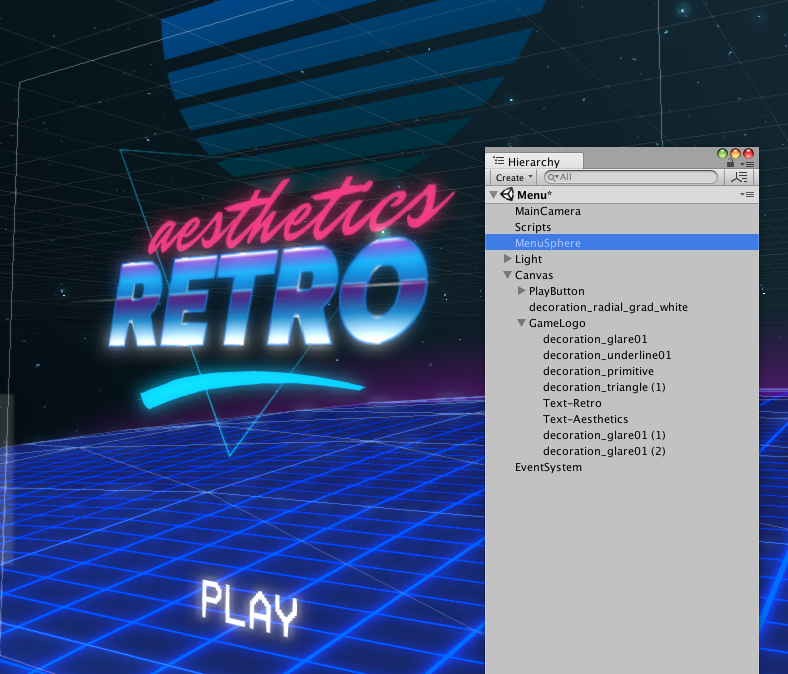
- Menu scene is an example of a generic title screen of a game.
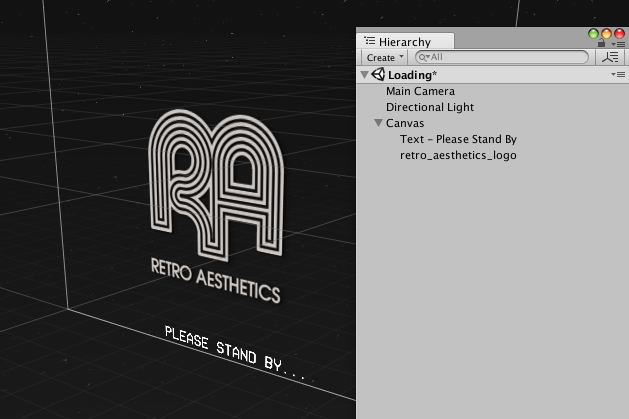
- Loading scene is the screen that is shown during loading of a user-selected level from the menu. In order to appear right away and cover full duration of loading, it needs to be light and simple.
Example game scenes
The racing demo has few scenes with identical gameplay, but different asset settings. You can browse through the scenes to get the feel of what retro look suits your game the most and use it as a starting point for your own look and feel.
The racing scene is build upon the standard Unity racing example with some modifications.
Let us overview a demo gameplay scene hierarchy and explain the items:
- Light – two directional lights are defining ambient color and shadows of the scenes. Asset’s object materials are implemented as Surface shaders, so that they play nicely with the lights.
- CarCameraRig – Game Object that contains camera and controls its behaviour. On the camera itself, along with optional standard Unity post-effects, located RetroCameraEffect, our post-processing script and shader. There is a section on this effect below. Note the SpeedTilt component of the Pivot Game Object – it adds an illusion of greater speed by changing camera position, rotation and FOV, based on its speed.
- RetroCar – the vehicle, controller by the player in the demo game.
- Track, Decorations – the static objects that compose the scene. The materials used are described below in this document.
- Music – contains the AudioSource that plays the music loop.
Shaders and Materials
There are several types of Materials in Retro Aesthetics asset:
- Retro Skybox
- RetroEmissiveColors
- RetroEmissiveTextured
- RetroGridGenerative
- Sprite Gradient Stripes
Let’s overview each of these.
Emissive Colors (RetroAesthetics/RetroEmissiveColors)
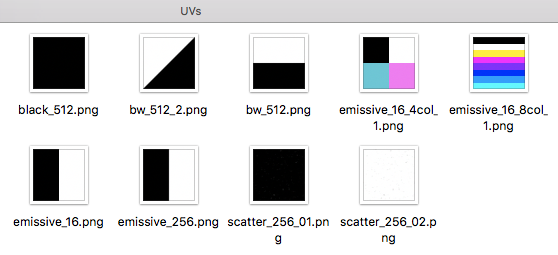
The materials in this asset are specifically designed for giving an opportunity for you to select which part of a mesh should glow and which one is just a diffuse color. To make it work, the mesh should be properly UV-unwrapped. On the picture below (screenshot of the RetroAesthetics/Textures/UVs folder) there are UV textures that are included in the package. As you see, the most part of them are just black-white textures. This shader uses textures as “glow maps” which mark the emissive parts of the objects. The colors of both emissive and dark parts of objects are set in the material settings, this way you can change colors of your scene without having to generate new uv textures. When creating a new mesh in 3D modeling software, you only need to set parts of the mesh that are supposed to glow to be projected on the white portion of the texture, while the parts of the mesh to diffuse – should be projected on the black part of the picture. Then, set the texture and the colors in Unity Editor as properties of a material that uses this shader.
Note: To see the glow, emitted by the object you need to add a Bloom post-effect component to the camera (as shown in demo scenes).
Emissive Textured Colors (RetroAesthetics/RetroEmissiveTextured)
On the same picture below there are a few textures containing blue, purple and other colors. This is made by an analogy of the Emissive Colors discussed above. The difference is that the colors of the diffused parts of the mesh, in this case, are predefined in the texture, as opposed to the Unity editor. In other words, use any UV texture with colors that fit your project through adding them on the texture. Meanwhile, the emissive parts of your mesh still refer to the white portion of the texture.
We describe the ways you can use UV textures in the Grids section below.
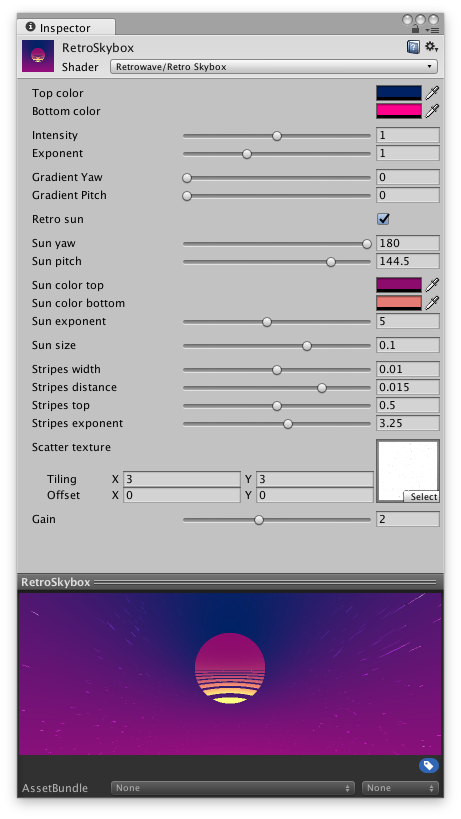
Skybox (RetroAesthetics/Retro Skybox)
The Skybox material (RetroAesthetics/Retro Skybox) consists of three major components:
- The color of the sky/background – defined as a gradient of two colors. Blue and red colors give the most authentic 80s look.
- Retro Sun – a classic stripe-shaped setting sun.
- Scatter texture – a texture overlayed on the backdrop gradient. Useful for stars or other small details.
Grids (RetroAesthetics/RetroGridGenerative)
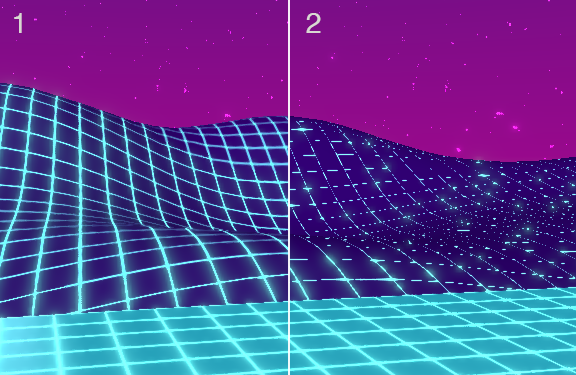
You can do Grids using two methods. The first is to use RetroEmissiveColors (RetroAesthetics/RetroEmissiveColors), which uses emissive textures of black/white frame. The second way is to generate the grid with RetroGridGenerative (RetroAesthetics/RetroGridGenerative). Both methods have similar parameters.
RetroGridGenerative generates the grid procedurally, so it does not require an input texture, does not depend on UV of the mesh, providing a quick solution for any model. However, if the lines are too thin, aliasing can become visible due to absence of color interpolation in fragment shaders. This is why we created a second option, RetroEmissiveColors, which utilizes textures for bilinear interpolation. The texture which is a material parameter defines the shape of the grid and still can be scaled to your needs. As you can see on the picture above, (1) is the textured material; (2) is generated grid.
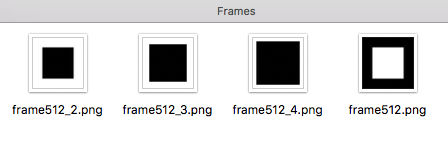
The similar interpolation problems (unless it’s not a problem) may occur when creating models. Below you can see the pictures of two methods of UV unwrapping.
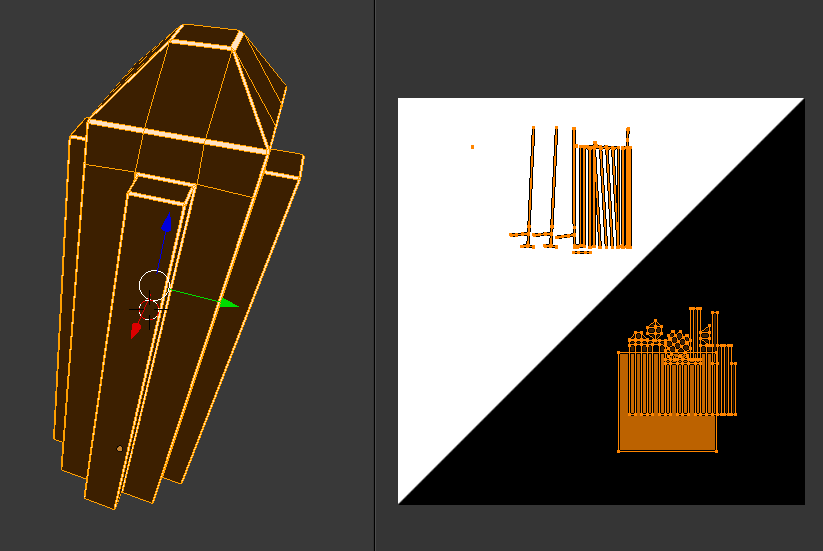
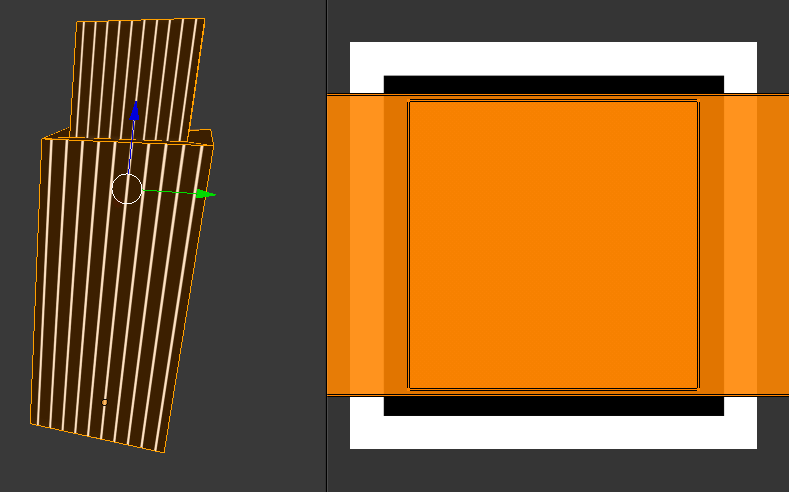
On the first picture, the model has physically predefined thin edges, which are projected on the white portion of the texture (white=glow, black=diffuse) (RetroAesthetics/Textures/UVs), on the second one we used a frame texture (due to the fact the ratio of black/white is uneven, we called it “frames” (RetroAesthetics/Textures/Frames) Basically, we needed any repeating pattern, where would be thin whites and thick blacks). On the model itself, the white parts are not hard-predefined, unlike in the first example. In other words, The white/black boundaries are are made in the model itself (1) and in the texture (2). The result is, again, the smooth thin lines that you get in Unity.
Camera Post-Effect
*NOTE:** If you are targeting mobile, you may need to add “Retro Camera Effect” to “Always Included Shaders” in your project’s Graphics settings.
This is where things get particularly interesting. You’ve got the variety of well-thought bits of vintage authenticity going on camera. The controls of the components look simple and clear. What makes the difference is the combination of things. Should you want to mimic the subtle wear of the cassette – bypass a few of effects, go moderate with those turned on. Or, if you want the heavy effect, you can do it, too.
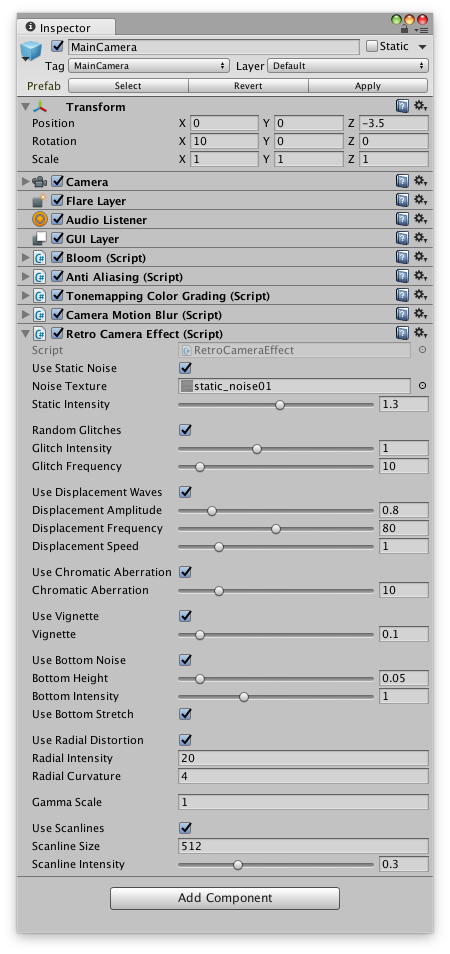
So, the main components of the camera effects are:
# Static Noise # Random Glitches # Displacement Waves # Chromatic Aberration # Vignette # Bottom Noise (Warp) # Radial Distortion # Gamma Scale # Scanlines
Important: If the RetroCameraEffect is not showing in the build of your game, it is probably because it’s not directly referenced in the project. To fix this, you need to add the effect shader to the always included shader list. To do this, go to Edit ▶︎ Project Settings ▶︎ Graphics and drag the RetroAesthetics/Shaders/Post-processing/RetroCameraEffect.shader file from Library to the “Always Included Shaders” list, appending it as a last item.
Models and Meshes
As you see, there is one example of this asset implementation included: the racing game prototype. Thus, the models were made for this case specifically. The decorations as well as the road spline were made in 3rd party 3D editor (in our case, Blender). The terrain was made with Unity’s native Terrain builder. All of the models (except road parts) are UV unwrapped (using one of two methods mentioned earlier in Shaders and Materials section of this document).
UI and Textures
You can find a lot of pieces of UI included in the asset. An example of so-called Logo Constructor is presented in Menu scene (Demos/Menu). There are a few ready-to-use bits of graphics, fonts (about fonts, look further in this manual), which can be viewed as an integral part of Logo Constructor.
Fonts
You can use the fonts installed on your system, apply a gradient mask or a solid color if needed. That requires quite some time. Alternatively, there are a bunch of bitmap fonts included into the asset (Fonts/Bitmap). The beauty of these is in the fact that the bitmap fonts have pre-applied gradient masks, they are ready to use – you don’t have to install them on your system, they are performance-friendly. Additionally, you can find even more fonts online by browsing websites like Fontspace. Moreover, we added each font in two versions: the one with pre-defined color texture; but if you’d like to change the color yourself, there is a second version, with plain white tint. You can distinguish them by looking at the name of the folder with corresponding font. In example, Monotron1 (the colored one) and Monotron_white (the one for you to color).
HINT: Check out Littera online service for bitmap fonts. It’s great!
Audio
For sure, the vital part of the retro vibe is the sound. When you are talking about 80s era aesthetics, you may think of old movie soundtracks or, perhaps, you know any contemporary music artist who works with such a sound (Com Truise, anyone?) Anyway, we included one music track for the racing demo and one for the menu. Both tracks are loopable. Also, there is a collection of go-to sound effects for your game project.
HINT: Although the sound effects are named something like “Boom”, “Zap”, “LevelDone” etc, be sure to audition them all for your specific needs. You may find “Blast.wav” sound suits your mouse click event better than actually “Click.wav”.